
Upgrading 3ds Max .NET Projects from .NET Framework to .NET 8
Originally posted at:

3ds Max 2025 and earlier versions have used the .NET Framework for building plugins, but, with the VFX world transitioning to .NET, 3ds Max 2026 brings this support with it. As such, .NET projects require a bit of housekeeping to get them compiled and working in .NET 8 for our case. This blog is a simple walkthrough of the upgrade process, using the public Explode Geometry Sample hosted here.
The Upgrade Assistant
Microsoft provides an Upgrade Assistant extension to help with porting .NET Framework projects to .NET as well as .NET Core to .NET and much more. The tool simplifies and aids in handling the upgrade intricacies, leaving just a few more steps for us to complete.
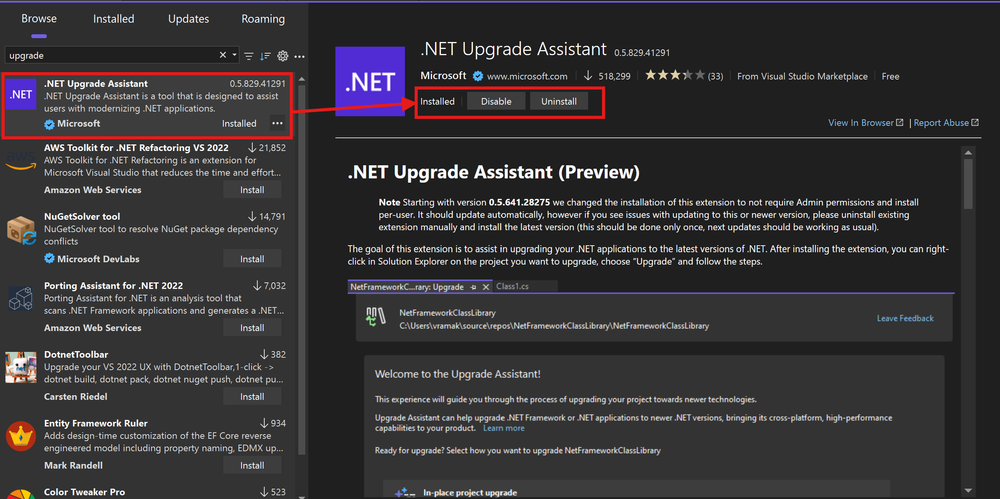
First, to get things going, check if you have the Upgrade Assistant installed. If not installed, the Visual Studio Extensions Manager should be your first stop. With Visual Studio opened, navigate to Menu > Extensions > Manage Extensions. Under the Extensions Manager, search for Upgrade Assistant and get it installed as shown below.

With the assistant downloaded, follow the instructions to get it installed. This may include having to restart the IDE to get the extension installed and loaded for use.
Please note that the Upgrade Assistant is available as both a Visual Studio extension and a command-line utility. In this blog, we will only cover using the Visual Studio extension.
Explode Geometry Project .NET Upgrade
Let's work with our [ADN Explode Geometry Sample] (GitHub link) available on GitHub and see how we can get it building and running in .NET 8.
Fetching the project
This is an easy step: clone the repo (SSH, HTTPS, ZIP, or any format you prefer). Note that our GitHub repo is already updated, so fetch the older tagged version for the 2025 code for the sample.
git clone --branch v2.7 https://github.com/ADN-DevTech/3dsMax-Explode-Geometry
cd 3dsMax-Explode-Geometry
In the Source folder, open the .csproj in Visual Studio.
Upgrading to .NET the Assistant way
As detailed in the Microsoft blog on the assistant, we can upgrade by right-clicking the project and selecting Upgrade. This opens a new project upgrade page.
Here, we select the project upgrade way and work with the in-place project upgrade, but feel free to test the other options if they suit your needs.

With the upgrade type ironed out, next, we need to select the .NET version to upgrade to. For our case, we are going for .NET 8.0 LTS; this is the expectation for 3ds Max 2026 .NET plugins. You may optionally get an action requirement to download and install .NET SDK if you don't have it yet; if so, proceed with that installation, then pick it up from here once done.

In the next step, we are required to select the files to upgrade. By default, all files in the project are checked, including the project file. Let's leave it as is and proceed with upgrading the selection. After the process completes, if no errors come up, then our project will have been transformed.
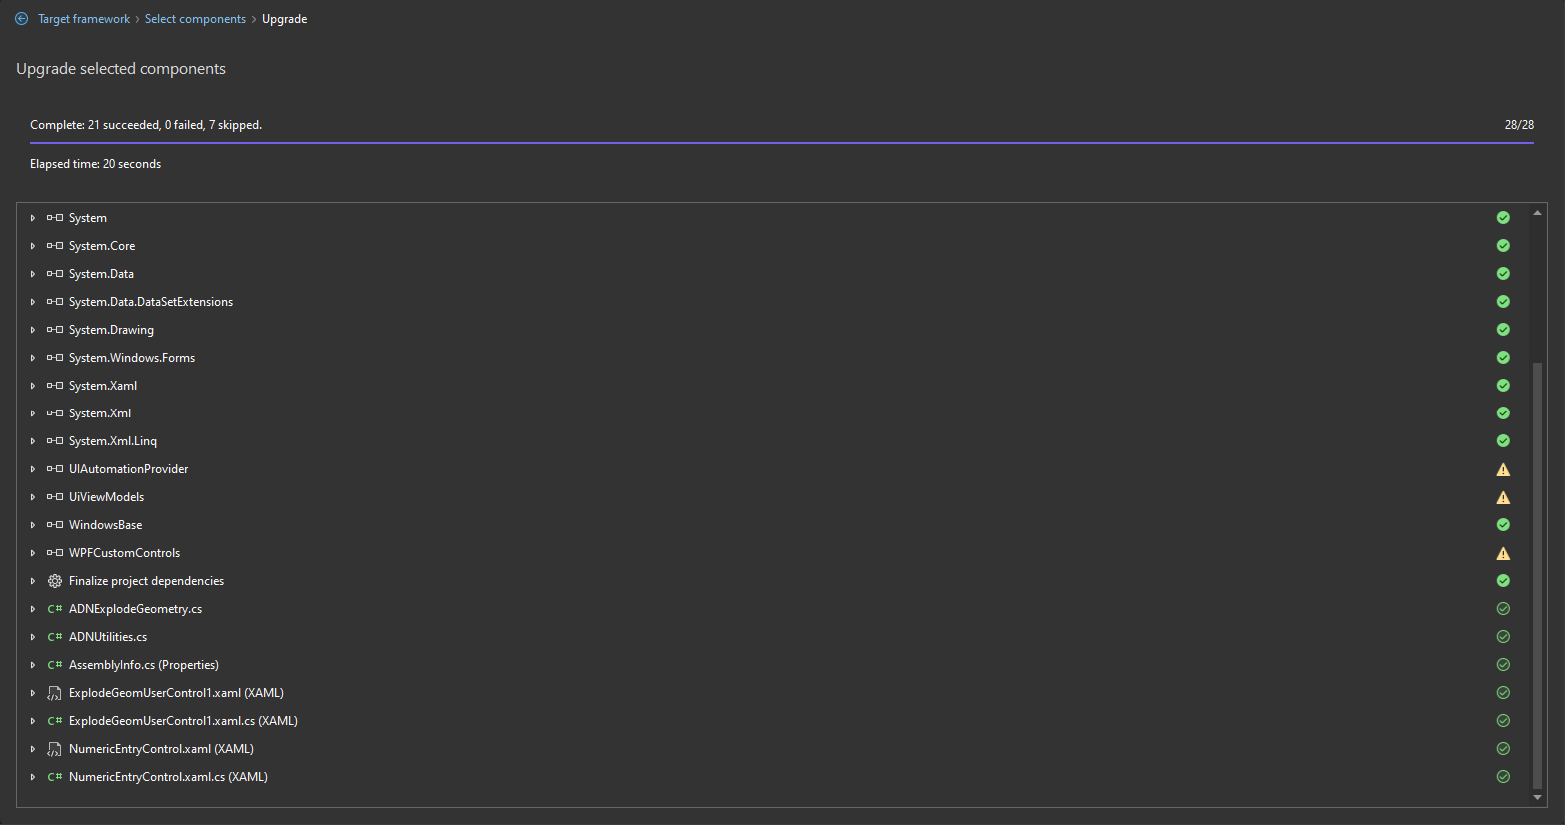
Probably, the project will try to build but fail; we will fix that shortly. To check the logs, switch the combo box as shown below to the Upgrade Assistant option.
At the end of this process, you should have a project file `.csproj` that has been updated to conform to the .NET 8 project format. Running the build fails due to missing references to the Autodesk assemblies that may have been dropped in the upgrade process. Don't worry; fixing this is easy!
To fix the missing Autodesk assemblies or any other internal or 3rd party assemblies, we can achieve that either by;
- Directly edit the
csprojfile by copying the ItemGroup for the assemblies from the old project file and updating where necessary. For instance, for the Autodesk.Max.dll assembly, we can have it included in the new project file as shown below, with the version updated to 2026, of course. The same will be done for the other project dependencies likeCSharpUtilities.dll, ManagedServices.dll, etc.
<ItemGroup>
  <Reference Include="Autodesk.Max">
    <HintPath>$(ADSK_3DSMAX_x64_2026)\Autodesk.Max.dll</HintPath>
    <Private>False</Private>
  </Reference> .... other assemblies
</ItemGroup>- Another way is making use of the Visual Studio Reference Manager that is accessed from the
Menu > Project > Add Project Reference > Browse& find your assemblies. Once all intended libraries are selected, click OK to add them. Just as in the option above, the new assemblies will be added back into the project file. Just FYI, we can change the assembly paths for the Autodesk assemblies to make use of the path variables. This way, any user can use our plugin despite the installation path they chose. For our case, we will use the path as $(ADSK_3DSMAX_x64_2026)\<assembly name>.

At this stage, we can build our project, and everything should now be okay. But, looking at the logs, our build outputs are going to the default Visual Studio project build directory and not the one defined under our debug/release property group. In .NET Framework project configuration, we had defined <OutputPath> inside each build type (Build/Debug); in .NET, we define it inside the first global <PropertyGroup> where we have our project defaults, as shown below:
<PropertyGroup>
  <TargetFramework>net8.0-windows</TargetFramework>
  ... the other config here
  <OutputPath>C:\Our\intended\path\for\the\assembly</OutputPath>
</PropertyGroup>
For our case, we will be using the Autodesk plugin path as our output path. This way, any plugin development changes can be updated in the plugin directory for testing.
Note: There may be extra steps to getting the assembly loaded into 3ds Max. If using PackageContents.xml, update where necessary to get the assembly and its dependencies loaded. Refer to the following documentation pages for help: Menu System Migration, Packaging Samples
Final Housekeeping
As a close, we need to do a bit of housekeeping. Here are a few things to consider:
- Setting included assemblies as not private: When we add assembly references in our project, the build process ends up copying the assembly references and their dependencies to the `OutputPath` directory, which is not the intended behavior. This results in duplication of assemblies, which may cause 3ds Max to crash. To resolve this, update each of the included assemblies as follows:
<Reference Include="ManagedServices">
  <HintPath> $(ADSK_3DSMAX_x64_2026)\ManagedServices.dll </HintPath>
  <Private> false </Private>
</Reference> - Disabling
AppendTargetFrameworkToOutputPathflag: Since plugins for 3ds Max are meant for Windows, we can disable the flag above to ensure the assemblies don't end up nested in a target framework directory.
<AppendTargetFrameworkToOutputPath> false </AppendTargetFrameworkToOutputPath>- Updating/bumping up plugin versions. This applies to both ApplicationVersion and AssemblyVersion
- Cleaning up some left-behind
<ItemGroup>locks, which are not required in .NET 8. - Since our plugin is intended to run only on the Windows platform, expect to see lots of warnings on platform compatibility. We can safely ignore these warnings using the snippet below:
<NoWarn>$(NoWarn);CA1416</NoWarn>You can find the complete upgraded sample on our ADN GitHub repo for reference.
What did I miss out on? Please let us know! Happy upgrading: smile:!